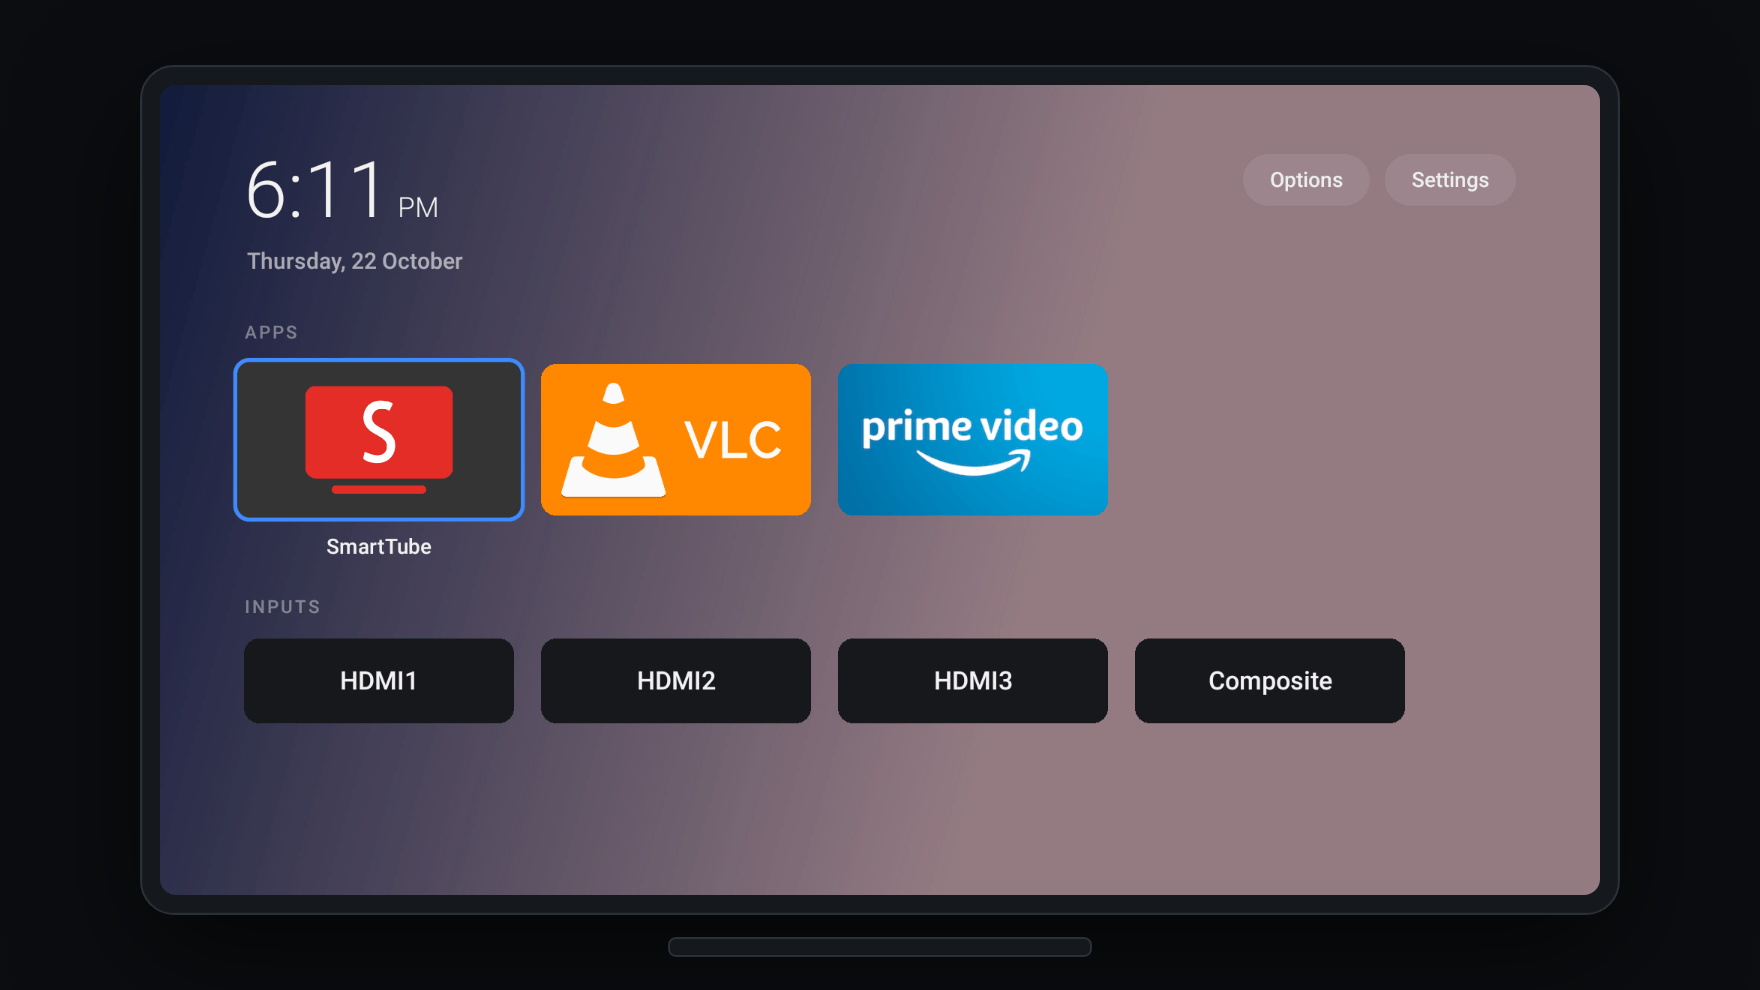
I don't need my TV to be smart. I need it to stop getting in the way.
My old Toshiba Fire TV still has a perfectly usable 4K panel. But the home screen had become a storefront: recommendations, promotions, voice features, and services I never asked for.
I use the TV for two things: SmartTube and HDMI. I kept the official YouTube app as a backup. That's it.
Buying another television to escape a software problem seemed ridiculous, so I tried a different approach: disable the junk, replace the home screen, and leave the hardware alone.
The result is a much simpler TV. No root. No custom firmware. No new device.
Here's what I did, what worked, and what I wouldn't touch.
The Setup
My hardware is a 2019 Toshiba 50LF711C20 Fire TV Edition.
- Internal model:
AFTKMST12(keira) - Operating system: Fire OS 6.7.1.1
- Android base: 7.1.2 (API 25)
- Architecture: 32-bit ARM (
armeabi-v7a) - RAM: About 1.5 GB
- Setup computer: MacBook Pro + Terminal
The project I used is dumbtv, an open-source toolkit for Fire TV. It uses Android Debug Bridge (ADB) to disable selected packages and install a lightweight home screen.
This is not an OS replacement. Fire OS remains installed. So does Amazon's original launcher.
That distinction matters. Replacing a launcher is one thing. Flashing unknown firmware onto a television is another.
Before copying this setup, check the project's tested-device list and the package lists for your Fire OS version. Don't use a Fire OS 6 configuration blindly on another TV.
Step 1: Connect to the TV with ADB
On the Toshiba, I went to:
Settings → Device & Software → Developer Options → ADB Debugging → On
If Developer Options is hidden, open Device & Software → About and press Select on the device name seven times.
Then find the TV's IP address in its network settings. The Mac and TV need to be on the same local network.
On macOS, install ADB with Homebrew:
brew install --cask android-platform-tools
adb version
Connect to the TV, replacing the example address with your own:
adb connect TV_IP:5555
adb devices
Accept the debugging prompt on the TV. adb devices should list the TV with the status device.
Then identify what you're actually working with:
adb shell getprop ro.product.model
adb shell getprop ro.product.device
adb shell getprop ro.build.version.sdk
Mine returned:
AFTKMST12
keira
25
Now I knew I was targeting the right Fire OS 6 family, not guessing from the Toshiba label on the back.
Step 2: Inspect First. Change Nothing.
I cloned the project and ran its preflight check:
git clone https://github.com/humblemuzzu/dumbtv.git
cd dumbtv
./scripts/preflight.sh
The preflight is read-only. It identifies the device, selects the appropriate package lists, and saves a snapshot of settings the restore script can use later.
My starting point:
Fire OS 6 / Android 7.1.2
221 packages installed
0 packages disabled
3 third-party apps
Before modifying anything, I also saved the original package states and copied the preflight report somewhere outside the repository:
mkdir -p ~/TV-Backup/dumbtv-preflight-report

adb shell pm list packages > ~/TV-Backup/packages-before.txt
adb shell pm list packages -d > ~/TV-Backup/disabled-before.txt

cp -R report/. ~/TV-Backup/dumbtv-preflight-report/
This isn't a firmware backup. It's a record of what was there and the settings the tool captured before changes.
The best rollback is the one you prepare before you need it.
Step 3: Choose What to Keep
I didn't want to run the project's full preset without reviewing it. Some of its optional features block firmware-update servers or restrict protected background services.
My priorities were simple:
- disable Amazon ads, telemetry, and Alexa components
- keep SmartTube and the official YouTube app
- preserve Wi-Fi, HDMI, the remote, and TV settings
- avoid extra on-device DNS filtering for now
- install dumbtv Home separately, after testing the debloat
This was my configuration, not a universal recommendation:
./scripts/configure.sh \
  --keep "com.amazon.wifilocker com.amazon.tv.ffsprovisioneeclient com.amazon.tv.forcedotaupdater.v2 com.amazon.tv.easyupgrade com.amazon.connectivitydiag com.amazon.tv.developer.dataservice" \
  --prime 1 \
  --alexa 0 \
  --launcher 1 \
  --dnsfilter 0 \
  --system-dns 0 \
  --youtube 0 \
  -y
A few important details:
--alexa 0disables the Alexa packages targeted by the project. I don't use voice control.--youtube 0leaves YouTube alone; SmartTube was already installed.--dnsfilter 0avoids installing dumbtv's on-device DNS filter and deliberately blocking Amazon's update servers.--prime 1leaves Prime Video support configured, even though I don't use it. On Fire OS 6, the project protects its core package; I didn't override that safeguard.--keepexcludes six additional Wi-Fi, provisioning, update, and diagnostic packages from the debloat pass.
I also skipped lockdown.sh. Disabling packages and restricting protected system services are different levels of intervention.
Step 4: Dry-Run, Then Debloat
Before making the change:
./scripts/debloat.sh --dry-runThis showed exactly which packages would be disabled and which would be preserved. The six packages in my keep list were marked SKIP.
Only then did I run:
./scripts/debloat.shThe script asked for confirmation, disabled the selected packages, applied privacy settings, and rebooted the TV.
My actual result:
disabled 30
protected 0
system-disabled 0
suspect 0
apps uninstalled 0
booted
Thirty packages disabled. Zero reported failures. None of my apps uninstalled.
That included selected advertising, shopping, metrics, logging, and Alexa packages. The TV came back with its original home screen intact.
I tested Wi-Fi, SmartTube, the remote, and HDMI switching before moving on.
Disabling a system package is usually reversible with ADB. Disabling the wrong package can still break essential features, though. Don't improvise a larger blocklist because a package name sounds unnecessary.
Step 5: Replace the Home Screen
Once the TV worked normally, I installed the project's own launcher:
./scripts/launcher.sh --dry-run
./scripts/launcher.sh
The installer downloaded a checksum-verified APK and installed dumbtv Home 1.11.
My installation finished with:
checksum ok
installed tv.dumbtv.home
home: dumbtv (Keeper, no accessibility; sdk 25)
home screen is dumbtv home
Then I checked everything:
./scripts/verify.shThe relevant results were:
ok    home       Keeper armed, front is tv.dumbtv.home/.Home
      packages   30 disabled
ok    settings   13 privacy settings as set
ok    launcher   installed 1.11
skip  dns        DNSFILTER=0, not checked
warn  data-saver off

all checks passed
The Data Saver warning was expected. I chose not to run the additional lockdown stage.
I hid Amazon Music, Freevee, Prime Video, and Downloader from the new home screen. The result was essentially SmartTube, YouTube, and HDMI. No subscription carousel. No endless recommendations.
And I didn't have to remove every underlying system app to get there.
The One Annoyance: Amazon's Home Still Flashes
There's a limitation worth knowing before you start.
On my Fire OS 6 build, pressing Home briefly shows Amazon's original launcher before dumbtv takes over. It happens even when I'm already on the dumbtv home screen.
This is how the project's Keeper workaround operates:
Home button
   ↓
Amazon launcher opens
   ↓
Keeper detects it
   ↓
dumbtv Home moves to the front
The flash is brief, but visible. It's a trade-off, not proof the installation failed.
Don't disable Amazon's launcher to fix it. Keeper relies on detecting that launcher, and removing it could make the TV harder to navigate or recover.
This is not the same as replacing the default launcher on an unrestricted Android device.
What About RAM and Privacy?
Before the cleanup, preflight reported roughly 401 MB free. After installing the new launcher and using SmartTube, I saw about 289 MB available. Following a full restart, the home screen reported around 620 MB free.
Those are snapshots, not a controlled before-and-after benchmark. Android uses RAM for caches and background processes. Free memory changes depending on what's running.
I also found that Amazon's original launcher still used around 105 MiB of proportional memory, while dumbtv Home used about 67 MiB. Both can remain resident because of the Home-button workaround.
The useful result wasn't a dramatic RAM number. It was a TV that still played video, switched inputs, and felt simpler to use.
Privacy has a similar caveat.
The debloat disabled many known tracking packages and turned off selected usage and ad-personalization settings. It did not make the TV invisible to Amazon. I deliberately skipped the project's DNS filter and protected-service lockdown, so some Amazon system services can still communicate over the network.
For additional network filtering, I already use OpenWrt and AdGuard Home. That's a separate layer, and it shouldn't be confused with blocking every possible telemetry request.
Fewer trackers is progress. Zero tracking is a claim that needs proof.
A Small Bonus: HDR Is a Separate Setting
While testing HDMI with my Nintendo Switch 2, I changed the Toshiba's HDMI input mode to Mode 2 (HDMI 2.0). The picture looked better afterward.
That setting belongs to the TV, not dumbtv Home. An alternative launcher doesn't replace the display pipeline, picture settings, or HDR negotiation.
If you're using a console or 4K HDR source, check your TV's input settings separately. The correct mode and available options depend on the model.
How to Undo It
The project includes a restore script:
cd ~/dumbtv
./scripts/restore.sh
It attempts to re-enable packages, restore saved settings, and return the Home behaviour to Amazon. Keep your original preflight snapshot and the TV's physical remote.
This process does not write a new operating system to /system, but that doesn't make every ADB change risk-free. A broken launcher, networking service, or remote integration can still be a headache if ADB becomes unavailable.
Also, once you're finished, turn ADB Debugging off in the TV's Developer Options. There's no reason to leave remote debugging enabled indefinitely.
What I Would Do Differently
Very little, but I'd keep the order exactly this way:
- Identify the hardware and Fire OS version.
- Save the initial state.
- Run preflight and a dry-run.
- Debloat only the reviewed packages.
- Test the actual TV functions.
- Install the launcher separately.
- Verify, reboot, and stop.
I would not chase another 20 MB of free RAM by disabling unknown system services. I wouldn't flash unofficial firmware. And I wouldn't confuse hiding an app with removing every service behind it.
The goal was never to win a benchmark.
It was to make an old TV useful again, on my terms.
A good television doesn't need to do more. It needs to get out of the way.
Sources and Further Reading
- dumbtv — GitHub repository
- dumbtv — Supported and tested Fire TV devices
- dumbtv — What gets blocked, and why
- dumbtv — How the launcher takeover works
- dumbtv — Launcher documentation
- Amazon — Connect to Fire TV through ADB
You Might Also Like...
- Turning an Old Fire TV into a Dumb TV (ADB + dumbtv)
- Getting Started with Neovim and LazyVim on macOS
- OpenWrt + AdGuard Home + Brave (on a Cheap/Used Router)
- Resend Contact Form Template (Next.js 16 + React 19 Update)
- Getting Started with Neovim and LazyVim on macOS
- EzTube: A Clean Script-Based YouTube Downloader for macOS
- NeatDev: The Portfolio I Wish Existed (So I Built It For Free)